Yealink MP54 Setup Instructions
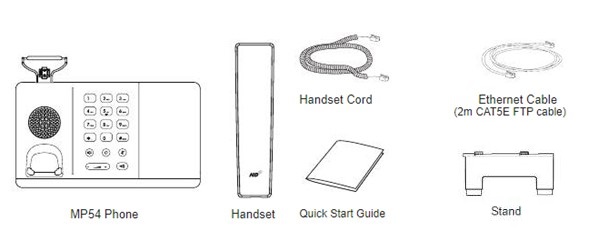
- Remove all components from the package.

PS: Keep the quick start guide and instructions with you for more information about the phone.
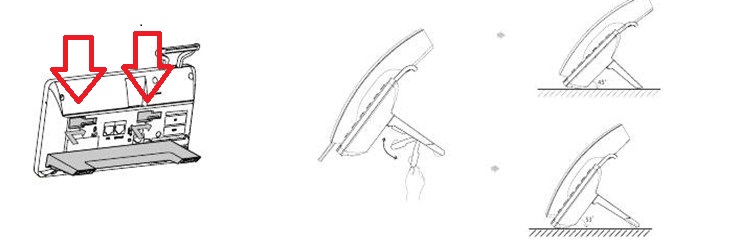
- Attach the stand
Attach the stand, by placing the square inserts in the matching holes and locking them to the right as seen on diagram below.

- Connect the cables

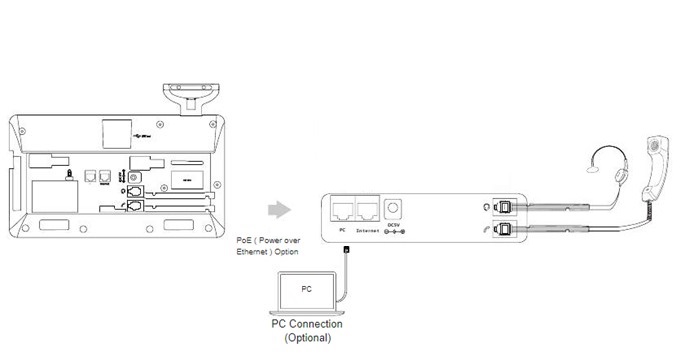
This is PoE phone which means that the phone is powered over ethernet.
Connected to the internet input, is the ethernet cable which is connected to the ethernet wall outlet.
Connected to the PC input, is the ethernet cable connected to the PC to share the internet connection, received by the phone through the internet input, with the PC.
I.E: The cable goes from the wall to the phone and then from the phone to the PC
Assuming you already have a phone with ethernet cables connected to it. One that indicates PC and the other internet.
Case 1: The PC receives ethernet through the phone.
In this case transfer the ethernet cables from the old phone to the new one in the correct order. Ex: PC à PC and Internet à Internet.
Case 2: The PC is connected directly to the ethernet wall outlet.
In case this each of the phone and the PC has an ethernet cable directly connected to the ethernet wall outlet.
After the setup, the phone should be powered up and the PC is receiving internet and
showing this icon:![]()
Following this, it is a straightforward process with instructions on the screen explaining how to login using your LSU credentials.
After you successfully log-in, you should be able to see your phone number at the top right corner.
Contact Us
If you encounter any issue or error message throughout the process. Contact us at: chemit.lsu.edu